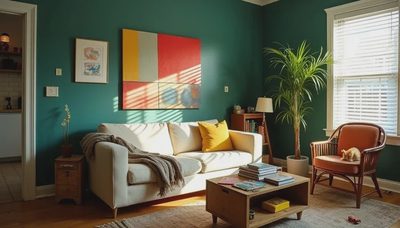
For two years after we moved into this Fort Greene apartment, our bedroom was the room we ignored. The living room got the deep teal walls and the $75 sofa and the gallery wall of kid art. The kitchen got the thrifted ceramics and the one open shelf I've written about. The twins' room got the bunk beds and the wall of books and the glow-in-the-dark stars on the ceiling. Our bedroom got nothing. It was the room we slept in, not the room we lived in. The walls were landlord grey-white — that cold, blue-undertoned non-color that makes every morning feel like you're waking up in a corporate housing unit. The bed was a metal frame I'd bought in my twenties from a Swedish furniture chain I won't name. The nightstand was a kitchen chair. The curtains were plastic mini-blinds that had warped in the afternoon sun. For two years, we treated our bedroom like a storage unit for our unconscious bodies, and it showed.
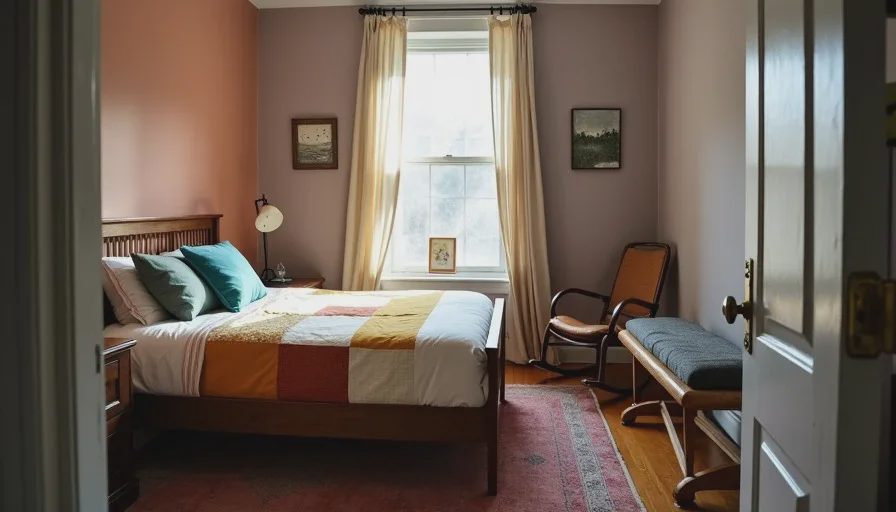
Then, about eighteen months ago, I decided to fix it. I gave myself a budget of $600 and a timeline of "however long it takes to find the right things." This was not a weekend makeover. It was a slow, piece-by-piece transformation that unfolded over several months, one thrift store visit and DIY project at a time. The result is the room you see in the photos — warm, quiet, layered, and deeply personal. It's the first room I see every morning and the last room I see every night, and it finally feels like the place where we rest, not just the place where we collapse. Here's how I did it, what I spent, and what I learned about no-spend room makeover work when you're doing it for real.
Before: The Room We Ignored
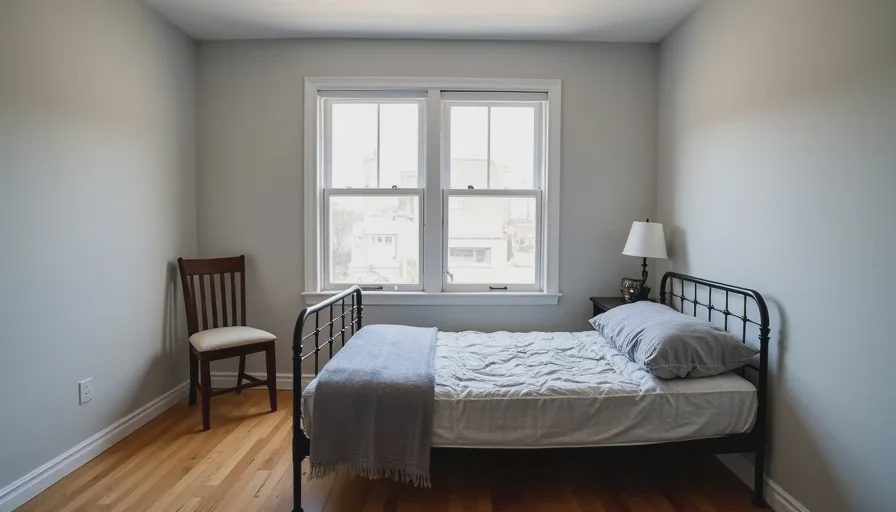
I have to start with the before, because the before explains why I waited two years to touch this room. It wasn't that the bedroom was terrible. It was that it was nothing. The walls were the same cold white-grey that every landlord in New York paints every surface because it's the cheapest gallon and it hides drywall flaws. The window had cheap plastic mini-blinds that had warped into a gentle S-curve from years of afternoon sun. The bed was functional but joyless — a metal frame with no headboard, the kind of bed you buy when you're twenty-three and you've just moved to the city and you tell yourself you'll upgrade later. Later never came.
The room had no rug, so every morning my bare feet hit cold wood. It had no art, so the walls stared back at me blankly while I tried to fall asleep. It had no personality. It was the room equivalent of a generic greeting card — inoffensive, forgettable, and destined for the recycling bin. When I finally decided to tackle it, I didn't have a grand vision. I had one rule: every item in this room should either be something I already loved, something I made, or something I found secondhand. The only exceptions would be paint (because you can't thrift paint) and bedding (because some things are worth buying new).
The Budget Breakdown: Every Dollar Accounted For
Before I walk you through the process, let me lay out the numbers. This is budget apartment decorating NYC reality — no hidden costs, no "I had this vintage rug lying around," no gifted items. Every dollar came from our bank account.
Paint and supplies: $70 (one gallon of dusty rose, one gallon of primer, roller, tray, tape, drop cloth)
Bed frame: $120 (Facebook Marketplace, solid wood, vintage 1940s, found after three weeks of searching)
Nightstand: $40 (Facebook Marketplace, oak, 1930s, has a drawer that sticks)
Rug: $90 (vintage Turkish, secondhand shop in Carroll Gardens, faded but intact)
Curtains: $25 (oat-colored cotton, bought new on sale, rod was already in the room)
Lamps: $35 (brass table lamp, thrifted at Brooklyn Flea; floor lamp, already owned)
Cushions and DIY covers: $18 (fabric from thrift stores — old linen tea towel, vintage mustard cotton, a wool sweater I felted and cut up)
Throw blanket: $15 (grey wool, thrifted, slightly moth-eaten at one edge)
Art: $20 (frame for my own painting was $8 at a thrift store, Felix's drawing was free, small vintage landscape was $12 at a flea market)
Bench at foot of bed: $40 (vintage rattan, Facebook Marketplace, already had the wool throw on it)
Rocking chair: $30 (Facebook Marketplace, oak, 1950s, needs a new seat cushion eventually)
Miscellaneous: $25 (curtain hooks, new lampshade for the floor lamp, a small plant)
Total: $528. Rounding up to $550 for the small things I'm probably forgetting. That leaves $50 of my $600 budget for the one thing I splurged on, which I'll explain in a moment.
Step 1: The Paint That Changed Everything
I knew I wanted a color that felt warm and enveloping but not dark. Our bedroom faces east, so it gets beautiful morning light but goes cool and shadowy in the afternoons. I needed a color that could hold its own in both conditions — warm enough to glow in the morning, deep enough to feel cozy in the evening. After testing four sample pots (the ghosts of paint mistakes past never fully leave you), I landed on a dusty rose — not pink, not beige, but something in between. It's the color of old brick, or dried roses, or the inside of a seashell. In the morning light, it reads as warm terracotta. In the evening, with lamps on, it deepens to a dusty mauve. It makes the room feel like an embrace.
I painted the walls myself over a single weekend. Marcus offered to help, but I have a thing about painting — I like to do it alone, with a podcast in my ears, while everyone else is out of the house. It cost $70 in paint and supplies. I used a matte finish because I wanted the walls to look soft and velvety, not shiny. Matte paint in a bedroom works because the walls don't get touched or scuffed the way they do in a hallway or kitchen. If you're painting a high-traffic area, go for eggshell. For a bedroom, matte is forgiving and beautiful.
Step 2: The Bed Frame Hunt
The metal bed frame was the first thing to go. I wanted wood — solid wood, old, with a headboard that had some presence. I searched Facebook Marketplace for three weeks, which in Brooklyn is about average for a specific furniture piece at a reasonable price. I saw a lot of terrible beds: particle-board frames listed as "vintage" (they were from IKEA, circa 2012), beautiful beds that cost $800, and one listing that was just a photo of a mattress leaning against a wall with the caption "bed $50 u pick up."
The bed I found is from the 1940s — dark walnut-stained wood with a simple arched headboard and tapered legs. The woman selling it was moving to Florida to take care of her mother. She'd had the bed since her first apartment in the 1970s. She was asking $150. I offered $120, which she accepted without hesitation. Marcus and I carried it up three flights of stairs — it came apart into four pieces, thank god — and assembled it in the bedroom that same afternoon. The moment we put it in place, the room felt different. A real bed, with a real headboard, in a real wood that had lived a real life before it came to us. That's the thing about secondhand furniture tips I keep coming back to: old furniture has gravity. It anchors a room in a way new furniture rarely does.
Step 3: The Nightstand, the Rug, the Layers
The nightstand was the easiest find. I searched "oak nightstand" on Facebook Marketplace, sorted by price, and found one for $40 in Clinton Hill. It's from the 1930s, solid oak, with a single drawer that sticks when the humidity is high and a small lower shelf that now holds my current book and a pair of reading glasses. The brass pull is original and has a natural patina that matches the lamp I found at the Brooklyn Flea for $25. The lamp is simple — a turned brass base with a cream linen shade — and it casts the warmest pool of light on the nightstand at night.
The rug took the longest to find. I wanted a vintage Turkish or Persian rug with faded reds and blues, something that would add warmth underfoot and visually anchor the bed. New rugs of this quality cost $800 and up. Used ones, with a little wear and a little fading, cost a fraction of that. I found mine at a secondhand shop in Carroll Gardens for $90. It has a small stain near one corner — wine, probably — and the fringe is frayed on one end. Neither of those things matters when the rug is under the bed. The faded reds and ochres in the rug pick up the dusty rose of the walls and the mustard yellow of the cushions, tying the whole room together without matching anything exactly.
Step 4: The DIY Cushions
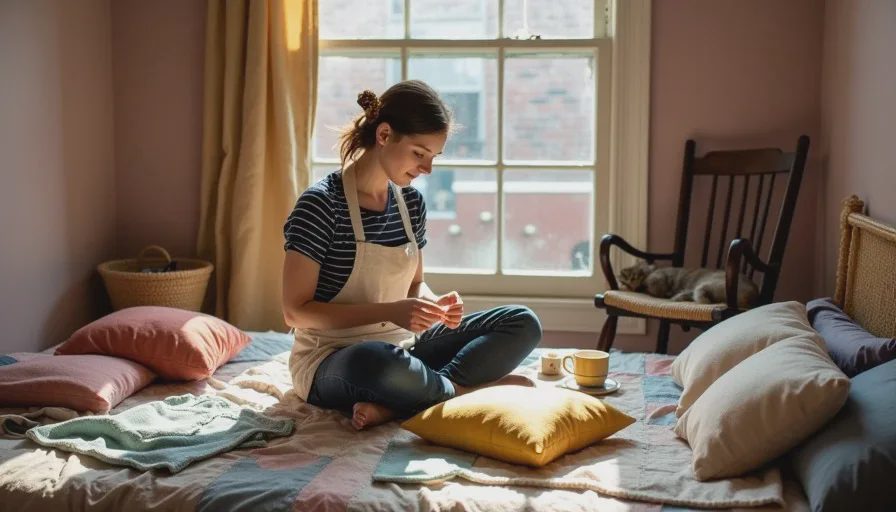
This was the most satisfying part of the whole project, and it cost almost nothing. I wanted cushions for the bed — the kind you lean against while reading, the kind that make a bedroom feel layered and inviting. But cushions are expensive. Even at discount home stores, a single cushion cover can cost $25 to $40. I needed four or five. That math didn't work.
So I made my own. I already had the cushion inserts — old ones from the living room that had been rotated out when I updated the covers there. For the new covers, I went thrifting for fabric. Not at fabric stores — at regular thrift stores, where old textiles cost a few dollars each. I found a heavy linen tea towel in a warm mustard yellow ($3), a vintage cotton tablecloth in a faded brick red ($4), and an old cream-colored napkin set that had never been used ($2). I also sacrificed a wool sweater that I'd accidentally shrunk in the wash — it had felted into a dense, soft fabric that was perfect for a textured cushion cover.
I'm not a skilled sewer. I can sew a straight line on a machine, and I can hand-stitch a hem if I'm patient. For these cushion covers, I used the simplest possible construction — an envelope closure on the back, no zippers, no buttons, nothing complicated. Each cover took about an hour. Total cost for five cushion covers: $18 in fabric and thread. The result is a bed full of cushions that don't match but all belong together, because they're all made from fabrics I chose with the same eye I'd use to build a color palette. Mustard, brick, cream, a little grey wool. They tie the bed to the rug to the walls. And every time I look at them, I remember the Saturday afternoon I spent making them, which is more satisfying than clicking "add to cart" ever could be.
Step 5: The Art, the Window, the Details
The art above the bed is a small abstract seascape I painted years ago — mostly grey-blues and soft greens, with a thin horizon line. It's not a masterpiece, but it's mine, and the colors work with the room. I framed it in a thrifted wood frame that cost $8. Next to it, I hung Felix's drawing of a star — a scribbly, enthusiastic crayon star on construction paper, taped into a small thrifted frame. The two pieces don't match in scale, style, or value. But they're both things I love looking at, and that's the only curation standard that matters.
The curtains were a rare new purchase. I wanted oat-colored cotton — warm but neutral, light-filtering but not sheer. I found a pair on sale for $25 at a home goods store. The curtain rod was already in the room, left by the previous tenants. I kept it. It's brass, slightly tarnished, and completely functional. The rocking chair by the window was a Facebook Marketplace find — $30, solid oak, from the 1950s. It creaks when you rock, which I find comforting. Gouache has claimed it as his afternoon sunbathing spot. The bench at the foot of the bed was already ours — I'd found it on Facebook Marketplace a year earlier for $40, vintage rattan with a woven seat. I moved it from the living room to the bedroom, draped a thrifted grey wool blanket over it ($15, slightly moth-eaten at one edge, which you can't see when it's folded), and suddenly the foot of the bed had purpose.
The One Thing I Splurged On
I said I'd explain the remaining $50 of my budget. I spent it on new bedding — specifically, a set of white cotton sheets from a company that makes them in a factory in India and sells them directly, no retail markup. They were $48. I could have thrifted sheets, but I chose not to. Sheets are the one textile that touches your skin for eight hours a night. I wanted them to be new, clean, and made of good cotton that would get softer with every wash. This is not a sponsored recommendation — I'm not naming the company because I don't do that. I'm just saying that if you're going to spend money on one new thing in your bedroom, make it the thing that touches your body while you sleep. Everything else can be thrifted.
What This Room Taught Me
The bedroom makeover taught me something I already knew but hadn't fully internalized: the room you ignore is costing you more than the room you fix. For two years, I walked into a cold, joyless bedroom every night, and I told myself it didn't matter because I was asleep most of the time I was in there. But it did matter. The first morning I woke up in the finished room — dusty rose walls, warm lamplight, the cat curled on the rocking chair, the quilt pulled up to my chin — I felt something I hadn't felt in that room before. I felt cared for. Not by a decorator or a brand or a magazine spread. By myself. I had made this room for me, with my own hands and my own choices, and it showed.
Renter-friendly home decorating and realistic family home decorating are not about having the most beautiful home on the block. They're about making the spaces where you actually live feel like they belong to you. Our bedroom cost $550 and took several months to finish. It's not done — rooms are never done. The rocking chair needs a new seat cushion eventually. The nightstand drawer still sticks. The rug has a wine stain. But every morning when I open my eyes, I'm in a room that feels like it was made for rest. And that, for less than the cost of one designer nightstand, is worth every hour I spent on it.
Letters
No letters yet — be the first to write.