A diy daybed can solve three annoying apartment problems at once: it gives you somewhere to sit, creates a real guest bed, and does not eat the entire room like a sectional. I built mine after realizing our second bedroom was mostly a storage unit with a window. The first version looked charming in photos and wobbled whenever anyone sat down. That mistake taught me more than any furniture tutorial. A good diy daybed needs a strong base, a sensible mattress, and enough visual restraint that it does not look like a pile of lumber wearing a blanket.
Start with the room, not the fantasy
Before buying wood, measure the wall, doorway, baseboards, radiator clearance, and the route the finished piece must travel. A twin mattress is usually about 38 by 75 inches, while a full is about 54 by 75 inches. Add at least two inches for the frame, and more if you want arms or a backrest. In a Brooklyn apartment, those extra inches can be the difference between furniture and an immovable wooden hostage.
For most small rooms, I prefer a twin-size diy daybed with drawers or open space underneath. It keeps the footprint narrow and gives you storage for spare bedding. A full-size version is more comfortable for overnight guests, but it starts behaving like a sofa-sized commitment. Sketch the footprint with painter's tape on the floor and leave it there overnight. If you keep kicking it, the design is too large.
My frame cost $118 in pine boards, screws, and corner brackets. The mattress was a $160 medium-firm twin from a reputable boxed-mattress brand, bought during a sale. I skipped the cheapest foam option because sitting on a mattress for hours exposes every weak spot. A $60 mattress is not a bargain if guests wake up feeling like they slept on a folded sidewalk.

Choose a construction method you can repair
There are three practical ways to make a diy daybed. The fastest uses a ready-made twin bed frame with a custom back and side panels. This is the least romantic option and the one I recommend for renters or anyone who does not own a miter saw. A second approach builds a simple platform from two-by-fours and plywood. It is sturdier, cheaper, and easier to resize, but it requires careful measuring. The third uses two matching low bookcases as supports, with a mattress platform across them. That creates useful storage, although cheap particleboard shelves can bow under constant weight.
I used a platform because I wanted the bed to survive children, adults, and one cat who believes every new textile belongs to him. The support slats sit no more than three inches apart, which keeps the mattress from sagging between them. I also added a center rail running lengthwise. That rail was not in my first plan. It became necessary after Marcus sat down and the plywood made a sound I can only describe as a furniture-based scream.
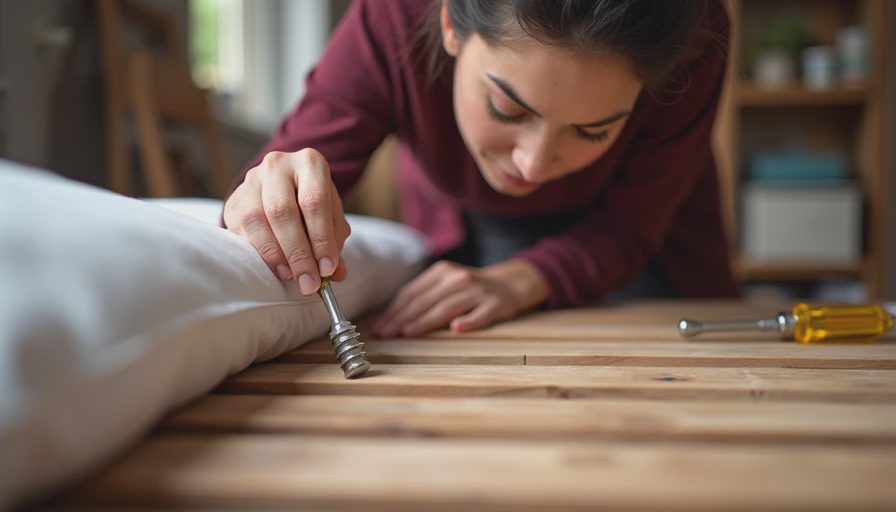
Do not rely on glue alone, decorative nails, or a few screws driven into end grain. Predrill the pine to prevent splitting, use structural screws where the frame carries weight, and check every corner with a square. If a joint wiggles before the mattress goes on, it will wiggle more after three months of daily use.
Make the back comfortable and believable
A diy daybed often fails visually because the back is either too low to lean against or so tall that it looks like a homemade hospital bed. I like a backrest between 24 and 30 inches above the mattress surface. That gives pillows somewhere to land without blocking a window or making the room feel boxed in.
For the simplest back, attach a painted plywood panel to a sturdy frame and fasten it into the wall studs if the piece will stay put. Renters can build a freestanding back and use anti-tip hardware designed for furniture. Put felt pads under every contact point, especially on hardwood floors. I learned this after discovering four ugly black marks behind the bed and pretending they were intentional for approximately one week.
The side arms should be low enough to slide onto the mattress easily. Mine are eight inches above the mattress, which gives the piece a sofa-like silhouette without forcing guests to climb over a wooden fence. A narrow ledge is useful for a cup, book, or phone, but keep it shallow. Deep ledges collect dust and become a second nightstand you never asked for.
Paint, stain, and fabric choices that earn their keep
I painted my diy daybed a warm gray-green using leftover interior latex paint in an eggshell finish. It hides fingerprints better than white and does not turn the room into a farmhouse catalog. For a rental-friendly version, leave the wood natural and use a water-based polyurethane. Sand between coats, especially on corners and the front edge where knees will make contact.
If you want color, test a sample beside the mattress and at night. Pale blue looked sweet at noon and aggressively nursery-like under warm lamps. A deep olive worked better because it connected the bed to the plants without shouting for attention. Use a real primer over knots; otherwise pine resin can bleed through and leave orange spots.
For upholstery, buy a washable quilt, a cotton coverlet, or a fitted slipcover instead of permanently stapling expensive fabric to the frame. I spent $42 on a striped cotton coverlet from a discount home store, and it has survived three years, two children, and Gouache's tendency to knead fabric with the confidence of a tiny landlord. Removable layers are not as sleek as a showroom cushion, but they are far more useful in a home where people eat snacks.
The details that prevent the homemade look
A diy daybed looks intentional when the mattress fits tightly, the hardware is hidden, and the lines repeat. Use matching wood thicknesses on the arms and back. Fill screw holes before painting. Round sharp front corners with sandpaper. Add one long lumbar pillow rather than six tiny decorative pillows that immediately migrate to the floor.
Keep the bedding simple: one fitted sheet, one coverlet, and two substantial pillows. If the mattress is exposed at the sides, add a tailored mattress cover in canvas or ticking stripe. Avoid a skirt unless you are deliberately going for a softer vintage look; gathered fabric can make a sturdy frame look like it is hiding a bad decision.
You can also add casters, but I would only use locking casters rated for the full loaded weight. Cheap wheels make a bed drift every time someone sits down. My first set cost $24 and lasted four months. The replacements cost $46 and have held steady for more than two years. That is the kind of upgrade worth making once, not the kind worth bragging about while shopping.
What I would build now
If I started over, I would make the same basic platform but add drawers from the beginning. I would use better plywood for the top, skip the decorative trim, and spend the saved money on a mattress with proper edge support. I would also finish the back before assembling it. Painting around a mounted panel involved contortion, vocabulary unsuitable for a family blog, and one small brush sacrificed to the cause.
Budget around $150 to $250 for a simple frame, $40 to $100 for paint and hardware, and $150 to $500 for a mattress depending on size and quality. Marketplace doors, salvaged boards, and old bed slats can lower the cost, but inspect used wood for moisture damage, pests, and warping. A beautiful free board is not free if it brings a colony into your bedroom.
The best diy daybed is not the one with the fanciest joinery. It is the one that fits your room, supports an actual adult, can be cleaned without a crisis, and still looks good after the novelty wears off. Build the structure carefully, spend money where bodies make contact, and thrift the personality. Taste is free. Everything else, we thrift.
Letters
No letters yet — be the first to write.