I built my first diy twin bed frame because the attractive ones cost more than the mattress, which felt personally insulting. The cheap versions looked like dorm furniture, and the vintage versions on Facebook Marketplace needed three people, a van, and a small exorcism. My solution was a simple wood platform with clean lines, sturdy slats, and enough clearance underneath for the storage bins that multiply in every city apartment.
This is not a precious woodworking project. You need basic tools, reasonably straight boards, and an afternoon when you can make a little sawdust. My finished frame cost about $145, including lumber, screws, felt pads, and a quart of paint. A similar ready-made frame was listed at $329 before delivery. Here is what I would do again, what I would skip, and where my first attempt went wrong.
Start with the mattress and the room
A standard twin mattress is 38 inches wide by 75 inches long. Measure yours anyway, especially if it came from a hand-me-down set or a guest-room conversion. I made the platform 39 inches by 76 inches, giving the mattress a small amount of breathing room without creating a dangerous sliding gap. If you prefer a more generous border, add a low headboard rather than making the entire platform oversized.
Before buying wood, tape the proposed footprint on the floor. I learned this after building a frame that technically fit beside the dresser but made the closet door open only halfway. In a small bedroom, two inches matter. Mark the path from the doorway, too. A beautiful bed that cannot turn the corner into the room is just expensive kindling.
For my diy twin bed frame, I used two 2-by-6 boards for the long sides, two 2-by-6 boards for the ends, three 2-by-4 support rails, and nine 1-by-4 slats. The nominal measurements are not the actual measurements, so check each board with a tape measure before cutting. Home improvement stores often have a rough lumber cart; do not be shy about sorting for straight pieces.
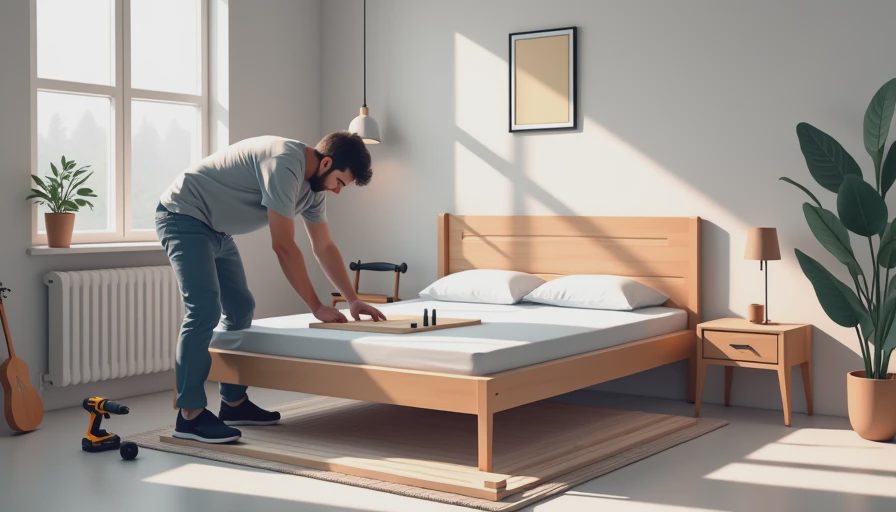
The shopping list that does not get ridiculous
Choose kiln-dried construction lumber without deep cracks, twisting, or large knots near the ends. You do not need premium furniture-grade boards for a painted frame. I spent $82 on pine, $18 on structural screws, $12 on wood glue, and roughly $33 on primer, paint, and felt pads. If you already own a drill, sanding block, tape measure, and circular saw, the project stays comfortably below $150.
Use screws designed for structural wood connections, not a random jar of tiny craft screws. I used 2 1/2-inch screws for the corner joints and 1 1/4-inch screws for attaching the slats. A countersink bit is helpful but not mandatory. Sandpaper in 80, 120, and 220 grit is enough. The 80 grit removes splinters, the 120 smooths the surfaces, and the 220 makes painted edges feel less like a punishment.
My strongest recommendation is to borrow a saw if you do not have one. Paying a local hardware store for straight cuts can also work, but give them a precise cut list and verify every board before leaving. A cheap frame is still a bad deal if the cuts are inconsistent by half an inch.
Build the base before you get fancy
Cut the two long side rails to 76 inches and the end rails to 36 inches. That creates an outside width of 39 inches when the end rails sit between the long rails. Assemble the rectangle on a flat floor, apply a thin bead of wood glue at each joint, and drive two screws through each side rail into each end rail. Measure corner to corner in both directions. If the diagonals match, the frame is square; if they do not, push one corner until they do.
For the diy twin bed frame to stay quiet, add the three interior support rails across the width. Place one near the head, one near the foot, and one in the center. I set mine so their top edges sat flush with the side rails. A center rail that is too low leaves the slats sagging; a rail that is too high creates a hump under the mattress.
Attach low-profile cleats along the inside of the long rails to support the slats. I used scrap 1-by-2 boards, mounted about 1 1/2 inches below the top edge. Pre-drill near the ends so the cleats do not split. This tiny step is what separates a solid bed from a frame that starts squeaking every time someone rolls over.

Slats, sanding, and the paint decision
Lay the nine slats across the frame with gaps of about 3 1/2 inches. The exact spacing depends on your mattress maker’s requirements, so follow those instructions if they specify a maximum gap. Keep the slats parallel, then attach each one to the cleats with one screw at each end. Do not glue them down; removable slats make moving and future repairs much easier.
Sand every exposed edge, especially the corners and the underside where someone might reach while searching for a missing sock. I rounded the front corners slightly with sandpaper instead of buying a router. That small change made the diy twin bed frame look intentional rather than assembled in a panic.
I painted mine a muted clay color using leftover wall paint topped with a water-based furniture sealer. It has survived three years, two children, a cat, and several enthusiastic pillow forts. For a natural finish, use a conditioner followed by a hard-wearing water-based polyurethane. Skip glossy paint unless you enjoy seeing every fingerprint from across the room.
The mistakes I would avoid
My first frame had no center support because I assumed the slats would distribute the weight. They did not. After six months, one slat bowed and the mattress developed a noticeable dip. I added the center rail, replaced the damaged slat, and have had no repeat performance. Do not treat the support system as decoration; it is the whole job.
I also made the first headboard too tall. It swallowed the room and made the twin bed look like a tiny theater stage. The second version is a simple 12-inch-high panel attached to the wall, not the frame. That keeps the bed lighter, makes sheet changes easier, and means I can repaint the room without wrestling a giant rectangle through the doorway.
Finally, test every joint before bringing in the mattress. Sit on each corner, shift your weight, and listen. A click usually means a loose screw; a long creak often means a board is rubbing. Fix those sounds now. They become louder at 2 a.m.
Making a budget frame look considered
The diy twin bed frame does not need decorative trim to look finished. Consistent proportions do more work than ornament. Keep the legs flush with the corners, align the slats, and choose one finish for the visible wood. I used six-inch tapered legs from an old table, but straight block feet made from leftover 2-by-4s would look just as good after sanding.
If you want storage, leave 10 to 12 inches beneath the platform and use matching canvas bins. Do not cram plastic tubs so tightly that you have to pull the bed away from the wall every time you need winter clothes. If the bed is for a child, anchor a tall headboard or nearby furniture to the wall and avoid sharp protrusions at mattress height.
You can also build the frame in two bolt-together sections if you live in a walk-up or narrow apartment. That costs a little more in hardware but saves your back and your relationship with the staircase. I wish I had done this in the East Village apartment with the hallway that turned exactly once, and never generously.
What the finished project is worth
After three years, my diy twin bed frame is still quiet, square, and better looking than the flat-pack frame it replaced. The paint has a few marks near the foot, which I consider evidence of a lived-in home rather than a defect. I have tightened the screws once, when I moved it across the room, and replaced one felt pad.
The real savings were not just the $180 difference from the store-bought option. I got a bed sized for the room, painted in a color I actually wanted, with storage clearance that works for our boxes. That is the argument for building rather than buying: you spend your money on the parts that matter and skip the decorative nonsense.
Take your measurements twice, buy straight boards, include a center support, and do not rush the sanding. A diy twin bed frame is one of the rare projects that can be inexpensive, useful, and genuinely attractive without pretending to be a showroom piece. Taste is free. Everything else, we thrift.

Letters
No letters yet — be the first to write.